Saturday, January 30, 2021

0000 0000 0101 0010

Frequency Tester Kit

From time to time I order kits to make, sometimes to see how they are put together, other times because I am interested in a particular result (e.g. a little Christmas decorative tree) but oftentimes the final product may be of some use.

In this instalment of "why did I order that?" I put together a kit for a frequency tester.

When it comes to fact checking, it is of course important to consider "Who watches the watcher?" and this kit does allow a form of calibration whereby the actual frequency of the 20MHz reference crystal can be taken into account for the measurement.

Of course temperature drifts and other factors could mean that calibration may need to be done a number of times before/during usage.

If you want to buy one of these handy little units and/or need a refresher on usage then see this link and/or this link, as for this video and blog I concentrated this time on the construction and (quick!) testing of this kit.


Saturday, January 23, 2021

0000 0000 0101 0001

Using a cheap oven to bake "chips"

The old man version of the Pesky Padauk Programmer is almost dead. Although in a previous blog and video I was able to talk to the STM32 and thus load the firmware onto this board - I was not able recognise or program any Padauk Chips <grrrrrr>.


In a parallel approach (multitask!) I bought a cheap oven and started to look at ways of monitoring/controlling the temperature (which was the subject of yet another previous blog and video) with the aim of baking SMD parts onto a PCB to maybe make a working programmer.

After testing the oven's capabilities, I opened up the stencil, scraped some solder paste onto a board and then spent a happy half hour carefully placing components onto the board.


The oven fired up and although it was clearly a bit "half-baked", the rig worked well and a few minutes later I had my first cooked PCB.


However, we have been here before and so it was with some trepidation that I loaded up the firmware, stuck in a padauk (PFS154) and firstly tried to recognise and then program the chip.

Success! And now we look at how to program these strange exotic beasts to do some useful work around the place instead of sucking up all my time!


Saturday, January 16, 2021

0000 0000 0101 0000

3D printed clockface

David Johnson-Davies makes the most beautiful projects on the face of the Earth. Great design, always practical and honed down to the bare essentials.

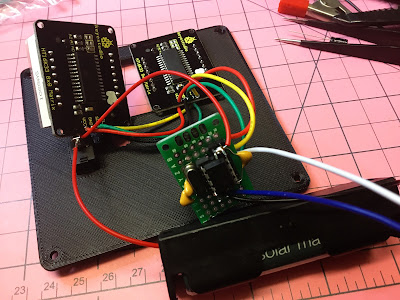
One which caught my eye a few weeks ago was a wonderful 8x8 LED matrix based clock.

I duly whipped up the clock according to his instructions, the only wrinkle being that the I2C based LED matrix modules needed to have solder bridges which result in a "hard wiring" of their I2C address.

On the breadboard the clock worked fine, so next up I decided to make a 3D printed fascia to fit the matrix modules plus a couple of switches.

Of course I forgot space for the battery, so the final design needed a couple of extra centimetres at the bottom to allow for a 18650 cell.


Next I used FreeCad and then Ultimaker Cura to first design and then slice the 3D model. I go into some detail for these processes in the video below.

The whole thing then needed some soldering and assembling and "voilĂ " we have a clock! I put some M3 bolts in the corners to stick to magnets and so it now sits on the fridge happily keeping time. I love the dissolve effect as it transitions from one minute to the next.

It's a bit battery hungry (a changed needed every 2 weeks or so), but considering I'm using cheap rechargeables at the moment it is not such an issue.


On my "to do" list is to further limit the brightness of the display as suggested by David on his original blog, plus modify the code to make a 24-hour version.


Saturday, January 9, 2021

0000 0000 0100 1111

First Mailbag of 2021

In this installment of "late and will they ever arrive" mail we look at:

Check it out in the video below and thanks PileOfStuff for inspiration for some of these items!